Quick answer
To reduce visible noise in a low-light photo, start with the original file, try one restrained processing pass and inspect shadows at 100%. EnhanceWizard Standard may improve mild grain, but it is not a dedicated high-ISO or RAW denoiser. Keep the original if the result erases texture or invents lines in dark areas.
Is the problem noise, blur or compression?
Low-light photos often show irregular colored speckles and grain in darker areas. Movement can create streaked edges, while missed focus produces softness. A heavily compressed copy may show square blocks or ringing near bright signs. These problems can appear together, but cleaning one does not guarantee that the others will disappear.
Compare a dark flat area with a textured surface, such as brick or stone. The goal is to reduce distracting speckle without treating all variation as an error. Do not use the smoothest output as the only measure of success; a street with flattened walls and melted window frames may look clean while representing less of the scene.
Recover the best source before processing
If you have the original camera file, use it rather than a messaging-app download or screenshot. A compressed copy can lose fine differences between texture and noise. Keep any RAW source separately: this tool accepts JPG, PNG and WebP rather than providing a RAW development pipeline.
Avoid brightening the same compressed copy repeatedly before enhancement. Inspect a first pass against the untouched version. If the important subject is both very dark and blurred, a different exposure or frame may be more useful than trying to reconstruct the lost detail.
Try a single photo noise reduction pass
The image-denoise page uses the existing Standard route. It is an entry point for trying mild noise cleanup, not a promise of a specialist denoising model.
- Choose the best supported image. Confirm it fits the displayed input limits; free processing needs a longest side of no more than 1,024 pixels.
- Select Enhance photo and Free Standard for a same-size first pass. Avoid enlargement until you know whether the basic treatment helps.
- Process once and inspect the aligned before-and-after view. If status checks lose the connection, resume checking that task.
- Open the 100% view and examine shadow speckle, thin lines, signs and material texture.
- Download the preferred version while its result is available. Keep the original as a reference.
Read the night-street example carefully
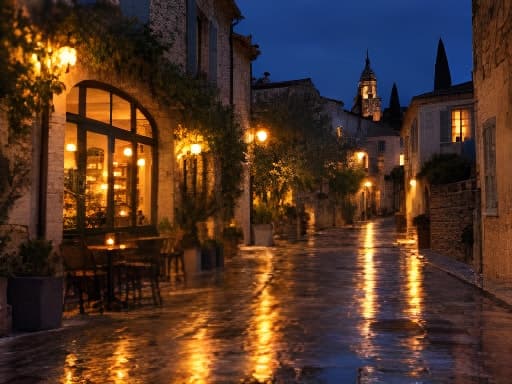
The demonstration input is an AI-generated night scene edited to simulate a low-quality capture with noise and compression. The paired output is produced by the actual Standard model at 2× scale, so it demonstrates enlargement and cleanup together rather than isolated same-size denoising. The shown source and output dimensions, scale and face-restoration setting belong to that specific evaluation.
Move the divider over the pavement and the wall beside the cafe. Then examine the window frame and bright reflections. A reasonable result might reduce distracting speckles while keeping structure recognizable. If small details disappear or new lines appear, that is a tradeoff to assess, not evidence of recovered information.
Noise reduction has a detail tradeoff
Texture can resemble noise at small scales. Fine hair, fabric and distant foliage therefore deserve attention after any cleanup. Some grain may be preferable to an overly smooth face or a wall that loses its natural surface. Evaluate the picture for its purpose and expected viewing size.
Read every important letter or number against the source. A brighter, sharper-looking sign may still contain estimated characters. For evidence, records or technical inspection, retain the original and avoid treating generated detail as verified scene content.
Give the next low-light photo more useful information
When possible, add light, steady the camera and capture several frames so you can choose one without movement. Exposure settings involve tradeoffs: a setting that reduces visible grain can still leave a moving subject blurred. Check the actual subject, not just the camera's sensitivity number.
For difficult RAW files or a large set of high-ISO images, use a dedicated workflow with adjustable denoising and output review. Standard enhancement is a practical experiment for a small photo, but it should not be presented as a replacement for every photographic processing task.
Inspect the actual model result
These are AI-generated simulated low-quality inputs paired with confirmed Standard outputs. They are not customer results. Settings and dimensions belong to each evaluation.
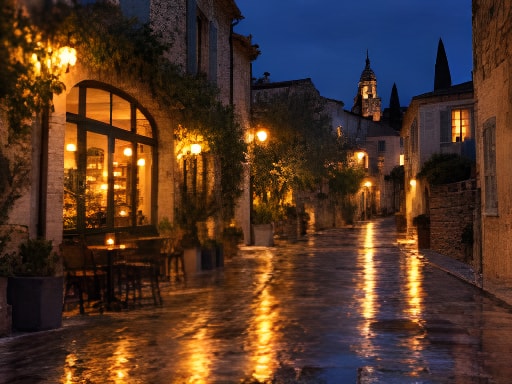
Drag the divider or use arrow keys in steps of five percent. Home and End show the full result or original.
Low light
After the street lights come on
Inspect shadow noise, stone texture and window edges. Standard may clean up mild grain; it is not a dedicated high-ISO engine.
Try this sample ↗Common questions
Does EnhanceWizard have a dedicated high-ISO denoiser?
No. The image-denoise page currently uses Standard enhancement, which may help mild grain. It does not provide a separate RAW or specialist high-ISO engine.
Why did my denoised photo lose texture?
A model can confuse small texture with noise. Compare the same area at 100%, and keep the source or use an editor with adjustable controls if important texture disappears.