Quick answer
Start old photo restoration with an untouched scan and a separate working copy. Fix capture problems, then use a dedicated repair workflow for scratches or missing areas before considering colorization. EnhanceWizard currently offers general Standard enhancement and photo-care guides; it does not provide dedicated scratch repair or black-and-white colorization.
Preserve the source before restoring an old photo
A family photograph can contain details you do not recognize yet: a badge, handwritten note, piece of jewelry or sign in the background. Keep a high-quality untouched scan and work on copies. Record what you know about the image separately instead of embedding guesses in the original file.
For a physical photograph, distinguish digital editing from conservation. Do not apply cleaning chemicals or attempt to flatten a fragile print based on a software guide. The Library of Congress offers public care guidance for family collections; consult appropriate conservation advice when the object itself is damaged.
Make a useful digital capture
Capture the complete print without cropping away borders or notes. Keep the camera or scanner aligned so faces and straight lines are not stretched. If using a camera, control reflections and avoid uneven light. Inspect the captured file before editing: a glare patch or a blurred corner is a capture problem that may be better fixed by another photograph.
Keep an archival master separate from the version you prepare for the web. A free enhancement input has a longest-side limit of 1,024 pixels, so use a smaller derivative rather than replacing a large scan. Extra output pixels from an AI tool do not become a new historical record.
Identify the type of damage
Mild softness, visible scratches, missing paper, fading and color casts are different problems. A general photo enhancer may improve perceived clarity but is not a dedicated repair tool. A torn corner needs a reconstruction decision, and a scratch across an eye requires particularly careful review.
EnhanceWizard's old-photo-restoration and old-photo-colorizer pages currently explain the workflow and link to existing tools. They do not expose a repair engine, automatic coloring or a decade selector. Use a specialist editor for those tasks, and inspect any reconstructed face or uniform against other family references.
A practical order for the work
Make each step on a new copy so you can compare changes and reverse an unsuitable edit.
- Save and label the untouched scan. Record the source and any known date or person names separately.
- Correct capture issues such as rotation, perspective or glare with an appropriate editor, or recapture the print if possible.
- Review scratches and missing areas in a dedicated restoration workflow. Keep reconstructed regions distinguishable in your working records.
- Try general enhancement only if mild softness remains. Check identity, clothing, text and small marks against the master.
- Treat colorization as an optional interpretation. Save the black-and-white master and the colored derivative as separate files.
Why plausible color is not verified color
A black-and-white photograph does not usually establish the original color of every object. A colorizer may choose skin, fabric or wall colors that look convincing without historical evidence. Reference photographs, surviving objects and family knowledge can inform an interpretation, but they should be distinguished from a model's estimate.
For a family album, an interpreted color version can be an engaging derivative if labeled clearly. For research, an exhibit or a documented archive, preserve the source and describe the edits. Avoid describing an automatic color output as recovered original color.
What the illustration on this page represents
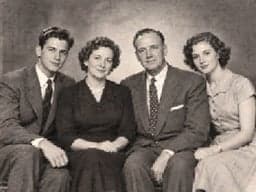
The family portrait used here is AI-generated period-style imagery. It is not an authentic historical photograph, a customer's restored family image or a repair benchmark. There is no restoration before-and-after pair for it because a dedicated restoration result has not been produced.
If you try Standard enhancement on your own scan, judge that individual result and retain the source. A guide should help you choose the correct workflow without making unavailable functionality appear to be ready.
Common questions
Can I restore scratches or colorize a photo with EnhanceWizard today?
Dedicated scratch repair and black-and-white colorization are not currently available. The pages provide independent guides and links to supported general enhancement.
Should I delete the original after restoration?
Keep the original digital scan and, where appropriate, the physical photograph. Save edited and colorized derivatives separately with a record of the changes.