Quick answer
EnhanceWizard offers a free Standard image enhancer without sign-up when the service and daily budget are available. Use a JPG, PNG or WebP with a longest side of no more than 1,024 pixels. One accepted image per device is allowed each UTC day, subject to an IP limit of two and a shared daily budget. Uploading a local preview alone does not spend the processing allowance.
When a free photo enhancer is a useful choice
A small portrait, a lightly compressed image shared in a message, or a photo with mild softness can be a reasonable starting point. The free workflow lets you inspect one result before deciding whether it belongs on your website or profile. It does not require a payment method or an account for the initial free task.
Start with a specific goal: clearer subject edges, less distracting grain, or a larger small image within the free boundary. If you need a full-resolution print, many images at once, heavy scratch repair or trustworthy reconstruction of unreadable text, this workflow does not meet that need. A clear source may change very little, and an enhancer cannot guarantee improvement.
What the free limit actually means
Both input and output are limited to a longest side of 1,024 pixels. A 768 × 576 portrait is eligible for a same-size enhancement. A 512 × 384 source can become 1,024 × 768 with the upscale goal. A 4,000-pixel camera original needs a separate smaller copy for the free path; keep the original for other uses.
The allowance counts accepted processing tasks rather than downloads. Once accepted, a task uses its attempt even if processing later fails or you cancel it. Attempts do not roll over or refill during the day. The workspace displays availability and the next reset; an IP restriction or shared service budget may prevent a task even when a device has not used its own allowance.
How to enhance an image for free
The upload preview and controls sit beside the result canvas, so you can make the selection and inspect the output in one place.
- Choose a supported image and confirm the source dimensions shown above the canvas. The preview stays local until you start processing.
- Select Enhance photo for the current size, Improve mild blur for a soft image, or Upscale image for a larger output. These goals use the Standard route, rather than separate specialist restoration engines.
- Keep Free Standard selected and review the proposed output size and available allowance. Leave optional face restoration off for your first comparison.
- Start once. If the task has been accepted and the connection drops, check the existing task instead of submitting another image.
- Inspect the fitted comparison and the 100% view. Download only after checking the details that matter to you.
What our portrait example can demonstrate
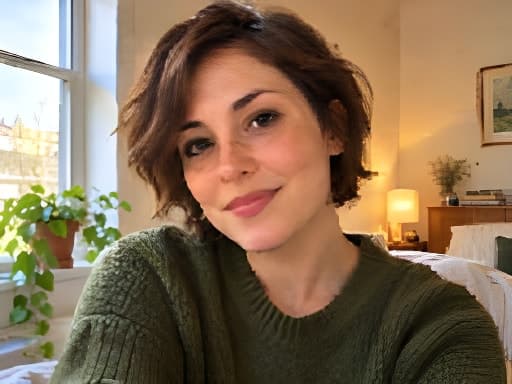
The example below uses an AI-generated portrait exported at 256 × 192 pixels, with simulated low-resolution capture characteristics as its input. Its comparison image is an actual Standard 2× result at 512 × 384 pixels, with the dimensions and scale shown beside the pair. It is a demonstration asset, not a customer's testimonial or proof of a recovered face.
Move the divider across the hair, sweater and freckles. Look for a useful reduction in distracting softness without losing facial marks or introducing smooth plastic skin. Compare at a matching display size: a smaller preview can hide defects in either version. If a detail changes meaningfully, the original may be the better choice.
When to keep the original or choose another workflow
Repeatedly enhancing an already enhanced image can compound guessed texture. Return to the untouched source if the first result develops halos, changes a logo or fails to help. For severe blur, a different camera frame often gives a better starting point than a stronger setting.
HD options require sign-in, an available paid service and a confirmed quote. Check the workspace for current availability and the exact credit cost before accepting a paid task. Free preview quality should help you make that decision; it should not be treated as a promise that a different paid model will produce the same result.
Inspect the actual model result
These are AI-generated simulated low-quality inputs paired with confirmed Standard outputs. They are not customer results. Settings and dimensions belong to each evaluation.
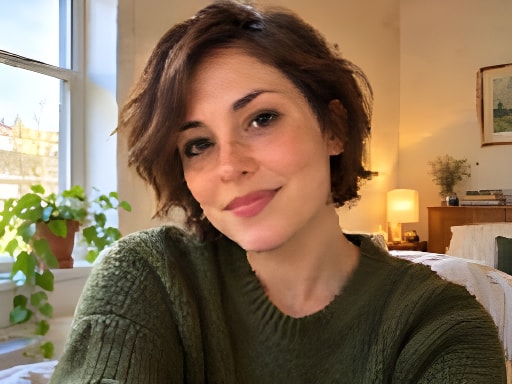

Drag the divider or use arrow keys in steps of five percent. Home and End show the full result or original.
Portraits
Window-light portrait
Inspect freckles, hair and sweater texture. Natural skin should still look like skin.
Try this sample ↗Common questions
Can I use the free image enhancer without an account?
Yes, the free Standard task can be started without sign-up when processing and quota checks are available. Paid output requires sign-in and a quote.
Does retrying a download use another free image?
Downloading an existing available result does not create another processing task. Starting another accepted task does use an attempt.
Will a free image enhancer fix severe blur?
It may improve mild softness. Severe motion blur and missing information cannot be reliably reconstructed; inspect the result instead of assuming that sharp-looking detail is accurate.